Table of Contents
- Introduction
- Using FinCEN in Green Check
- Initial SAR Filings
- Completing a FinCEN SAR
- Event Driven SAR Filings
- Create a CTR
- Export and/or e-File FinCEN Reports
Important Note: FinCEN E-Filing (Auto-Filing) is now available in Green Check. Please see this guide for turning on auto-filing for your institution.
Introduction
The purpose of this document is to provide instructions on how to use Green Check Verified for FinCEN CTR and SAR filings. Green Check can assist your operations, including helping you track 90-day SAR filings, with auto-generated and pre-filled reports.
Please note: your financial institution is required to be a registered user of FinCEN’s BSA E-Filing website. This link will bring you to a video demonstrating BSA E-Filing using FinCEN’s User Test System.
Disclaimer: This document is provided for informational purposes only and should not be relied upon as legal advice. This document should not be construed as including complete coverage of all policy elements required by your institution and must be modified by your institution to appropriately conform it to your institution’s organizational structure, risk profile, and business lines.
Using FinCEN in Green Check
There are four tabs on the FinCEN page in Green Check. Below is a list of the workflows, descriptions, and functions.
| Tab Name | Description |
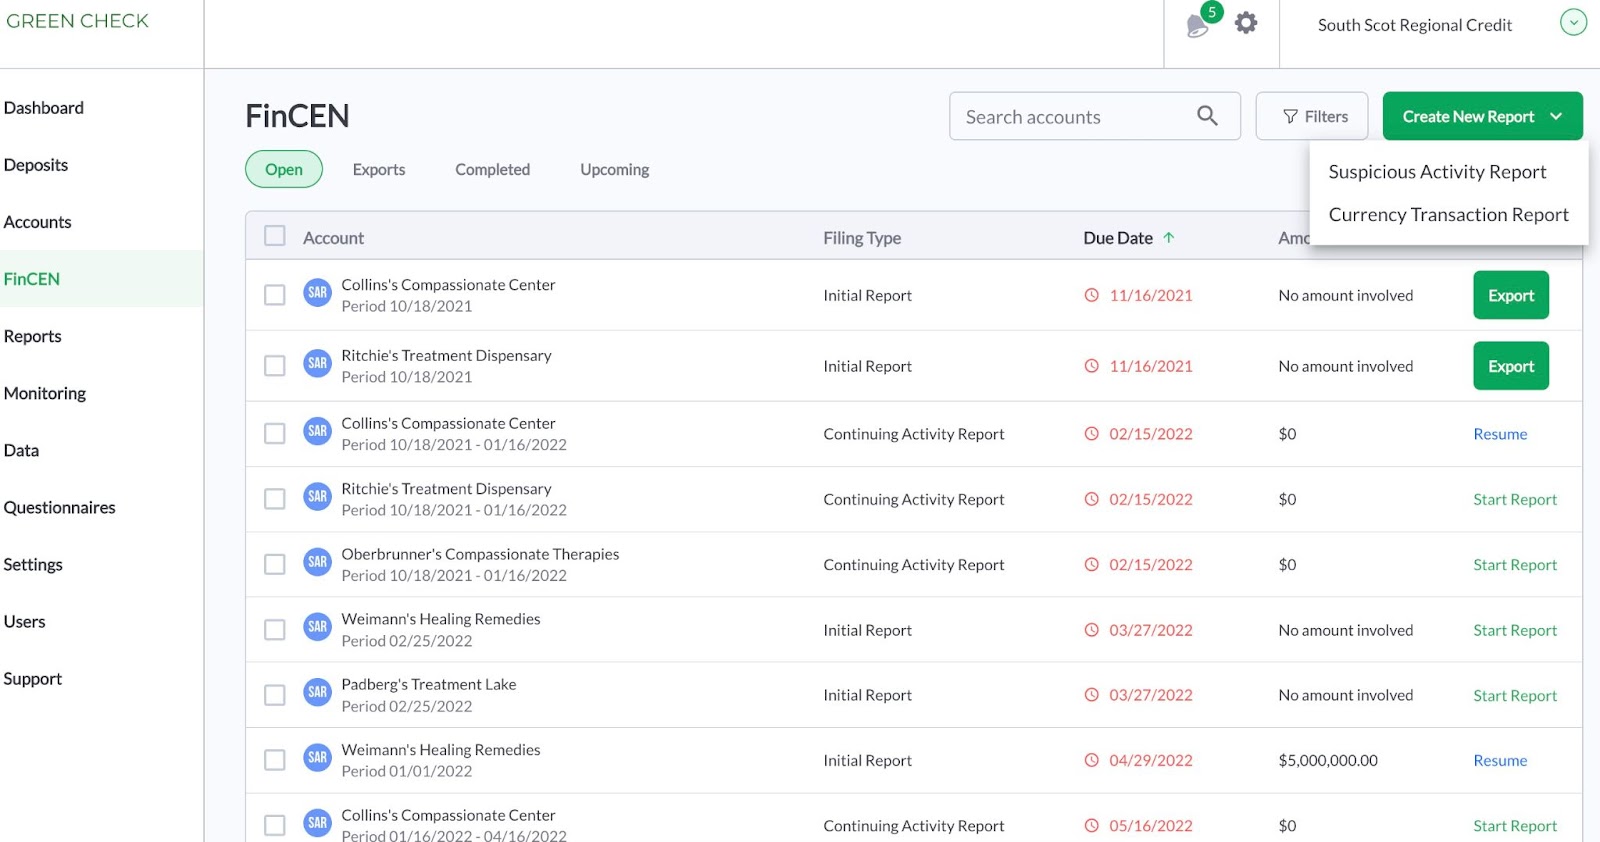
| Open |
The first tab is a list of Open reports which consists of both auto-generated and manually-created reports. You have the option of searching for a specific business with the Search Accounts field and you can also apply a variety of Filters such as Report Type, Status, and Due Date. You can also manually create a report using the green Create New Report dropdown. |
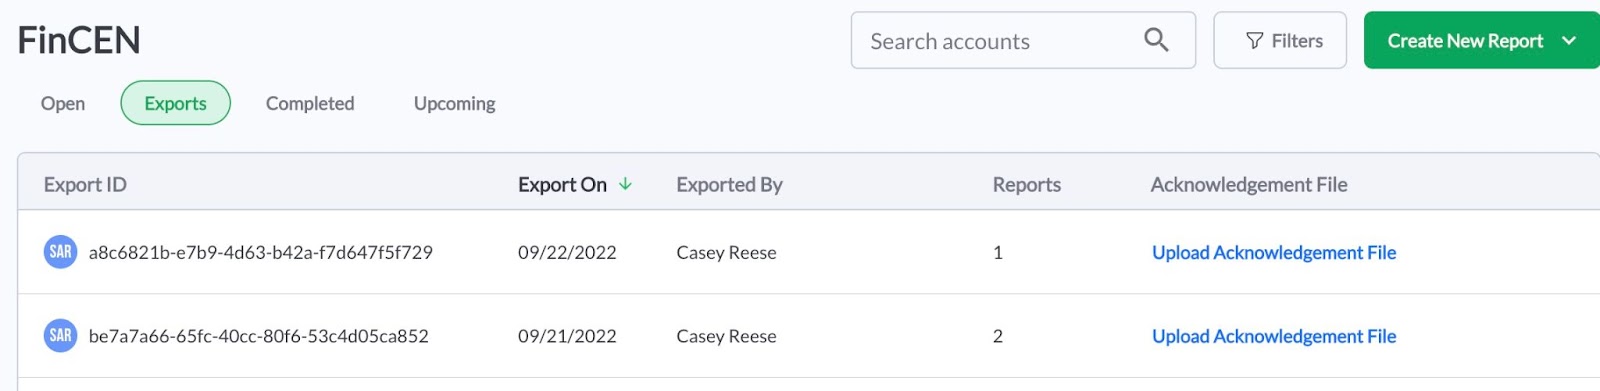
| Exports |
The second tab is a list of Exports files that consist of completed FinCEN reports that have been exported for the purpose of BSA E-Filing submission. Once you receive an acknowledgement file from BSA E-Filing, you will upload this acknowledgement in the Export tab. |
| Completed |
The third tab is a list of Completed FinCEN reports that have been submitted through BSA E-Filing. The tab also contains high-level details for FinCEN reports including the Account Name, Date of Export, Amount involved with the filing, Start Date involved with the filing, Tracking ID and BSA ID. Once you submit a report through BSA E-Filing, you will input the Tracking ID and BSA ID under this tab. |
| Upcoming | The fourth tab is a list of FinCEN SAR reports that have been submitted through BSA E-Filing and reflects Upcoming continuing SAR reports that have been generated from SAR reports previously submitted through BSA E-Filing. Using the Report Available Within data set, you can manage your supplemental SAR workload. At day 90 from the prior SAR filing, the related SAR will carry over to the Open tab to facilitate the SAR review and subsequent filing, if applicable. |
Initial SAR Filings
Once you have approved a new CRB’s onboarding application in Green Check and opened an account(s) in your Core System, you will be prompted to enter the account details (Account ID, Risk Rating, Account Opening Date, Review Frequency, and Peer Group) in Green Check. This final approval step will trigger an email and an in-platform notification to authorized users informing them that there is a new regulatory report to review. This is the initial Marijuana Limited SAR.

To begin the SAR filing process, navigate to the FinCEN tab in the Green Check platform. You will see the regulatory report under the Open tab.
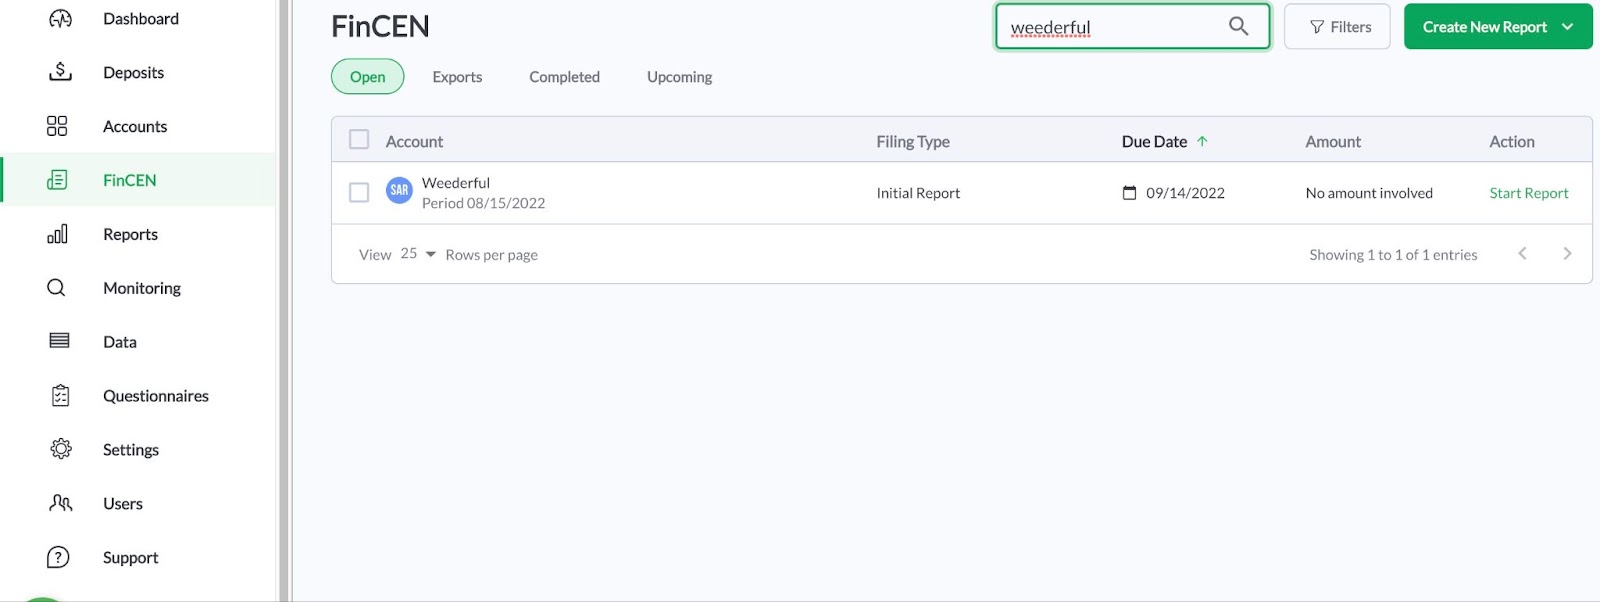
Click Start Report underneath the Action header. As you move through the report and complete the fields, you will see a progress bar at the top of the report screen that indicates the completeness of the report through green check icons.
Please note: the Auto-Generate Report in 90 days is automatically set to trigger a continuing SAR report in 90 days.

Completing a FinCEN SAR
Adding Additional Branch Information
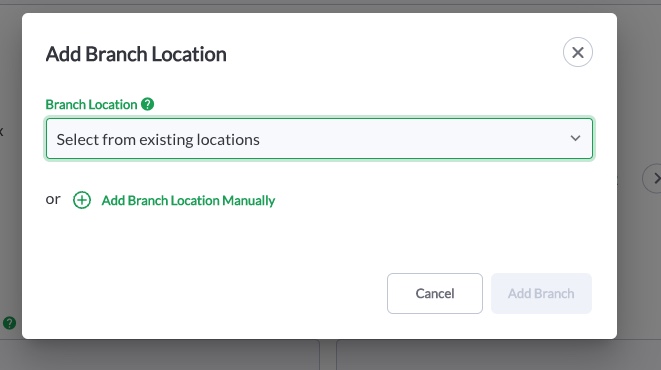
If there are multiple branch locations involved with the report, select Add Another Branch under the Branch Information section of the report.
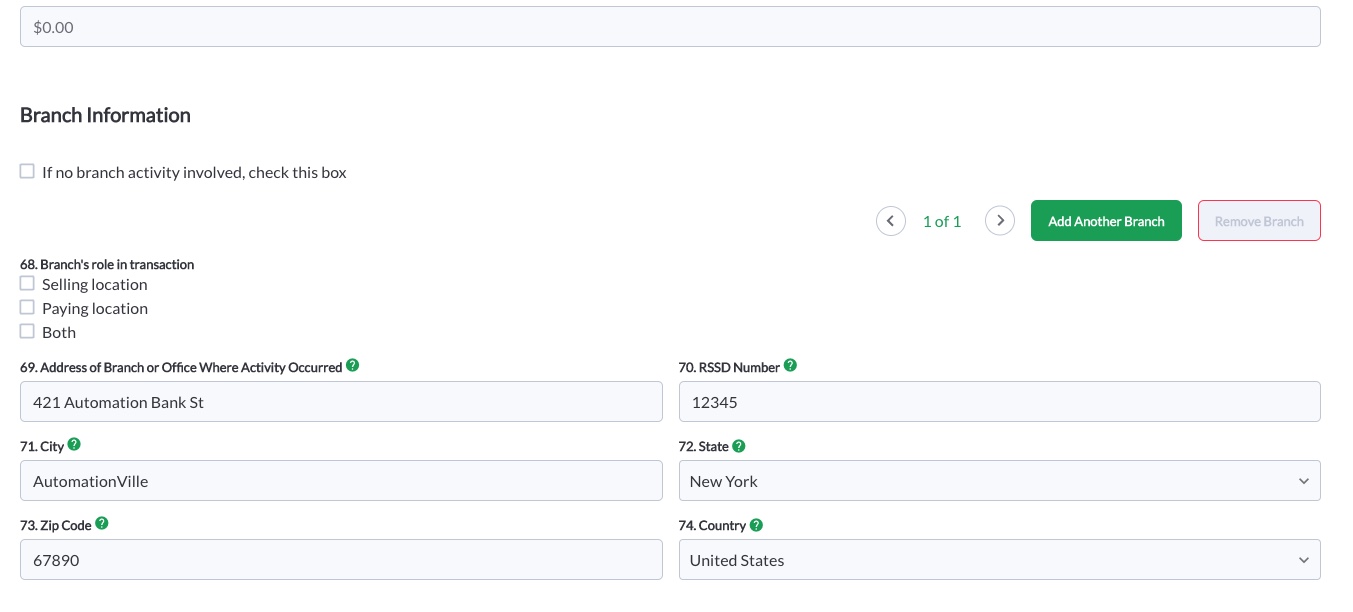
You will then be able to select the appropriate branch from the branches you have configured into the platform under Settings. You also have the ability to manually add branch information.
Viewing Transactions Related to SARs
When completing the Suspicious Activity Information section of the SAR report, you have the ability to click View Transaction Summary to confirm transaction totals that occurred during the timeframe of the SAR.

This button will open a modal asking you to confirm the start and end dates, as well as the affected account numbers for which you want to review transactions.
This is also where you will choose the payment types that you would like to include in your transaction summary. Do so by selecting the payment types to include.
Click View Transaction Summary to view the transaction totals for the selected accounts, date range, and payment types.

The Transaction Summary will open, which includes the following information (see screenshot below):
- Total Amount
- Cumulative Amount (if applicable)
- All deposit and withdrawal Information for each affected account number and specified payment information (you can collapse and expand each section)
- Button to insert the amounts into the Total Amount and Cumulative Amounts into the respective fields
- Button to insert the all transaction data from this summary into the SAR Narrative field

Once confirmed, use the buttons mentioned above to insert all amounts into the report and narrative.
Once you have completed all sections in the report, the radio button Complete will be available to click.
After you select the option to complete the report, the system will navigate you back to the FinCEN landing page and you will have the radio button Export available to select.

Insert SAR Narrative
Use the Transaction Summary Drawer to insert a SAR Narrative (using the Insert SAR Narrative button). This will include all deposit and withdrawal data for related account numbers and chosen payment types, inserted automatically into the narrative field at the bottom of the report without the need to copy and paste.

If you forget to insert the narrative while viewing the Transaction Summary—don't worry! You can also use the Review & Insert Template link below the narrative field, which will prompt you to confirm all info prior to inserting the template.
- This is a standard SAR Narrative template, but should be customized with additional information as needed for your particular reporting and narrative needs (example of the standard template below).
- It's important to double check that the Total Amount and Cumulative Amount fields match what's being reported in the SAR Narrative before completing this SAR.

Exporting and Submitting FinCEN Reports
When selecting the export option, a window will appear to confirm the action:

Next, select the option in the pop-up window to export. This will download the XML file. You will save this file with your internal records and then proceed with the E-Filing process.
After the file has been submitted via BSA E-Filing, you will receive a confirmation from BSA E-Filing confirming the file has been accepted and you will receive Tracking ID. This information can then be added to the Green Check platform under the Completed tab in the FinCEN module.


Once BSA E-Filing provides notification that the report has been acknowledged (typically 2-3 days after submission), BSA E-Filing should be accessed to view/download the report’s acknowledgement file. This file should then be uploaded into Green Check for documentation and retention purposes. Acknowledgements should be uploaded under the Exports tab within the FinCEN module with the corresponding export file. This will automatically map the BSA ID for each report contained in the export.
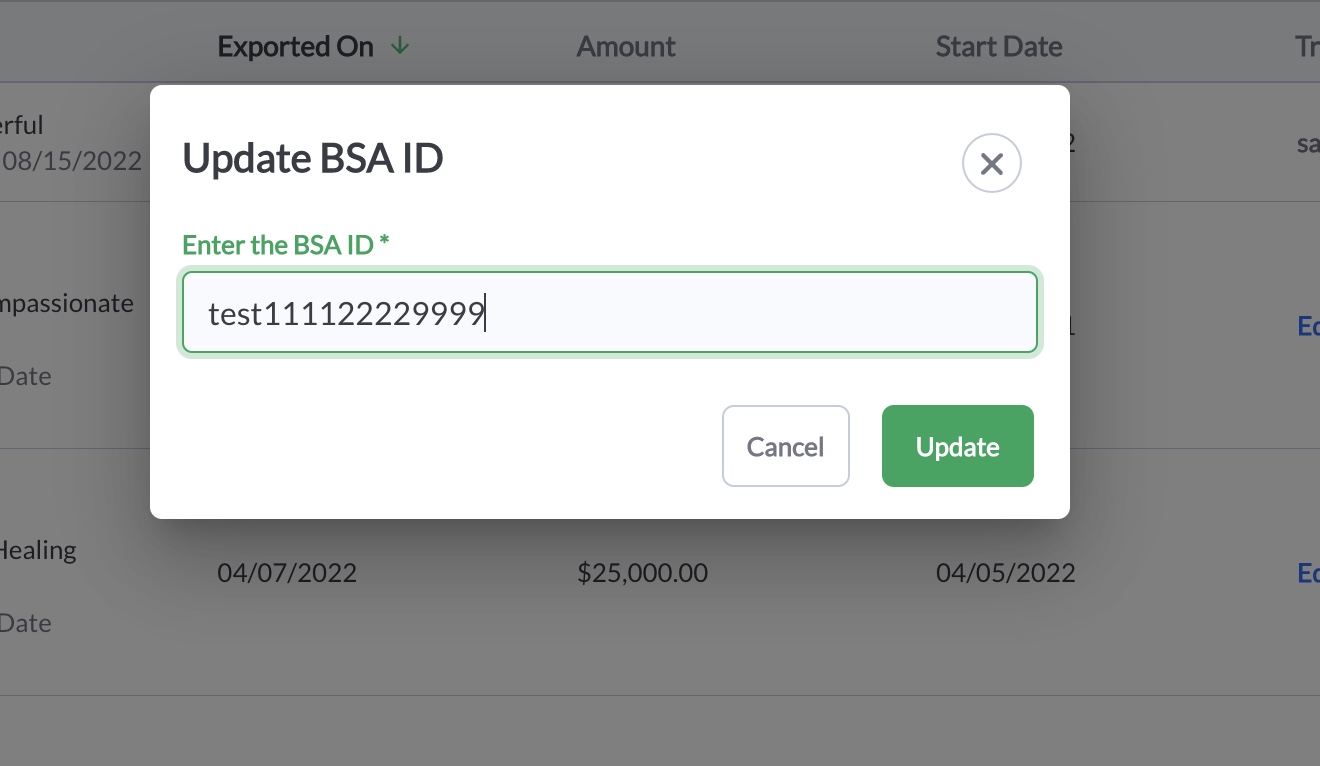
Alternatively, you can choose to enter the BSA ID for each report manually by using the Completed tab.
Recurring SAR Filings
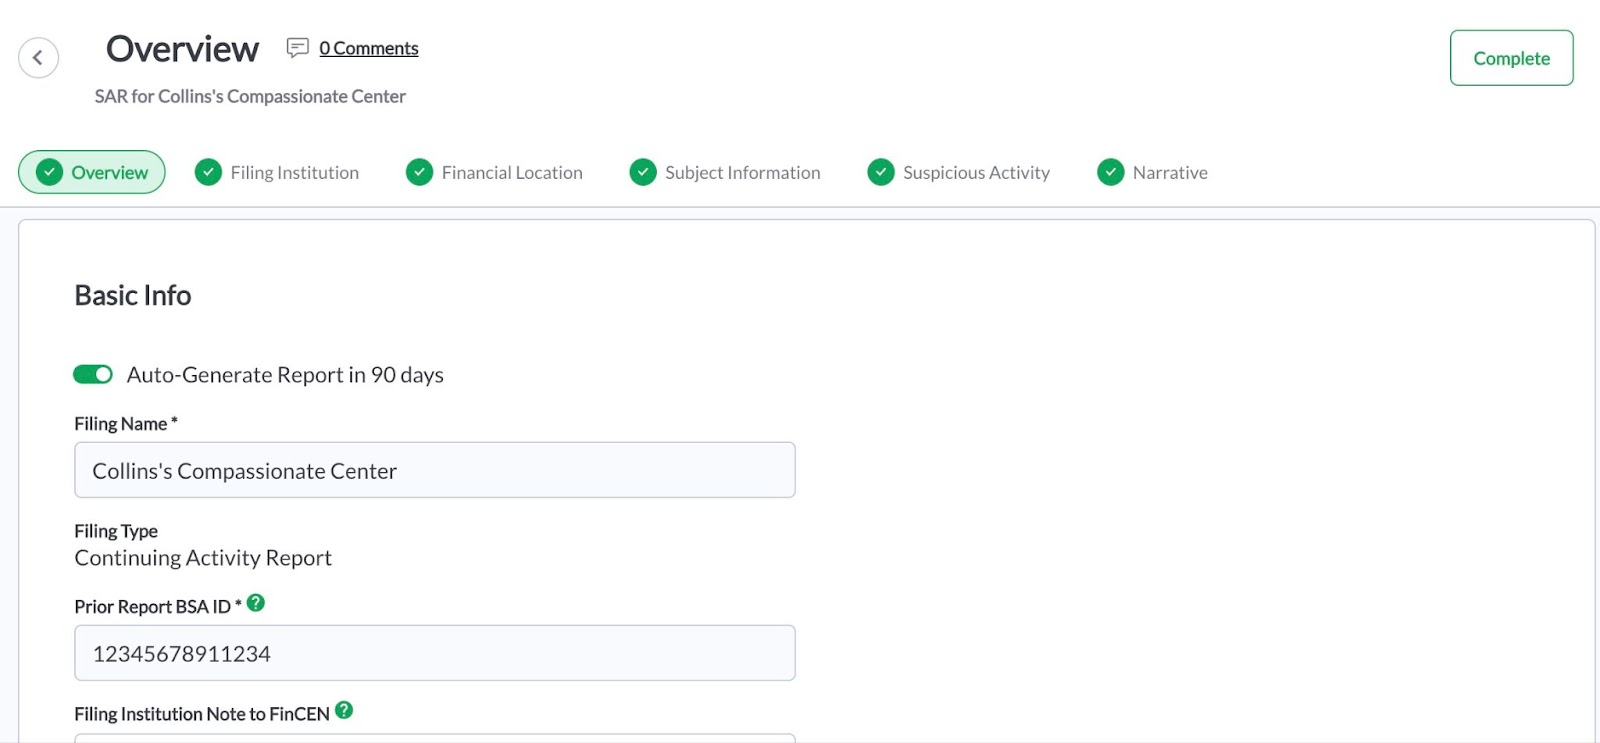
Continuing SAR forms are auto-generated at day 90 within the FinCEN module of Green Check Verified. Once a continuing SAR has been generated, you will receive notification to initiate the review. To begin the recurring SAR filing process, navigate to the FinCEN tab and you will see the regulatory report under the Open tab.

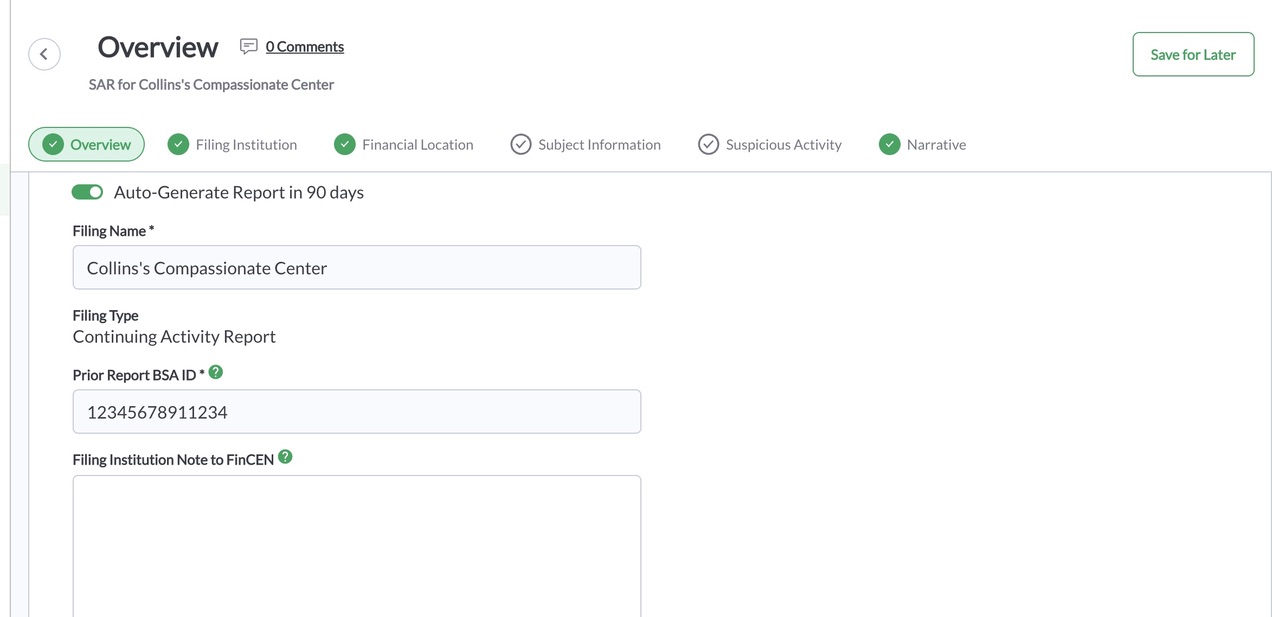
Click Start Report underneath the Action header (or Resume as reflected in the image above). As you move through the report and complete the fields, you will see a progress bar at the top of the report screen that indicates the completeness of the report through green check icons. In the example below, all of the report sections have been completed with the exception of the Subject Information section and Suspicious Activity section.
Please note: the Prior Report BSA ID will automatically populate within the Overview section of the report.
Event-Driven SAR Filings
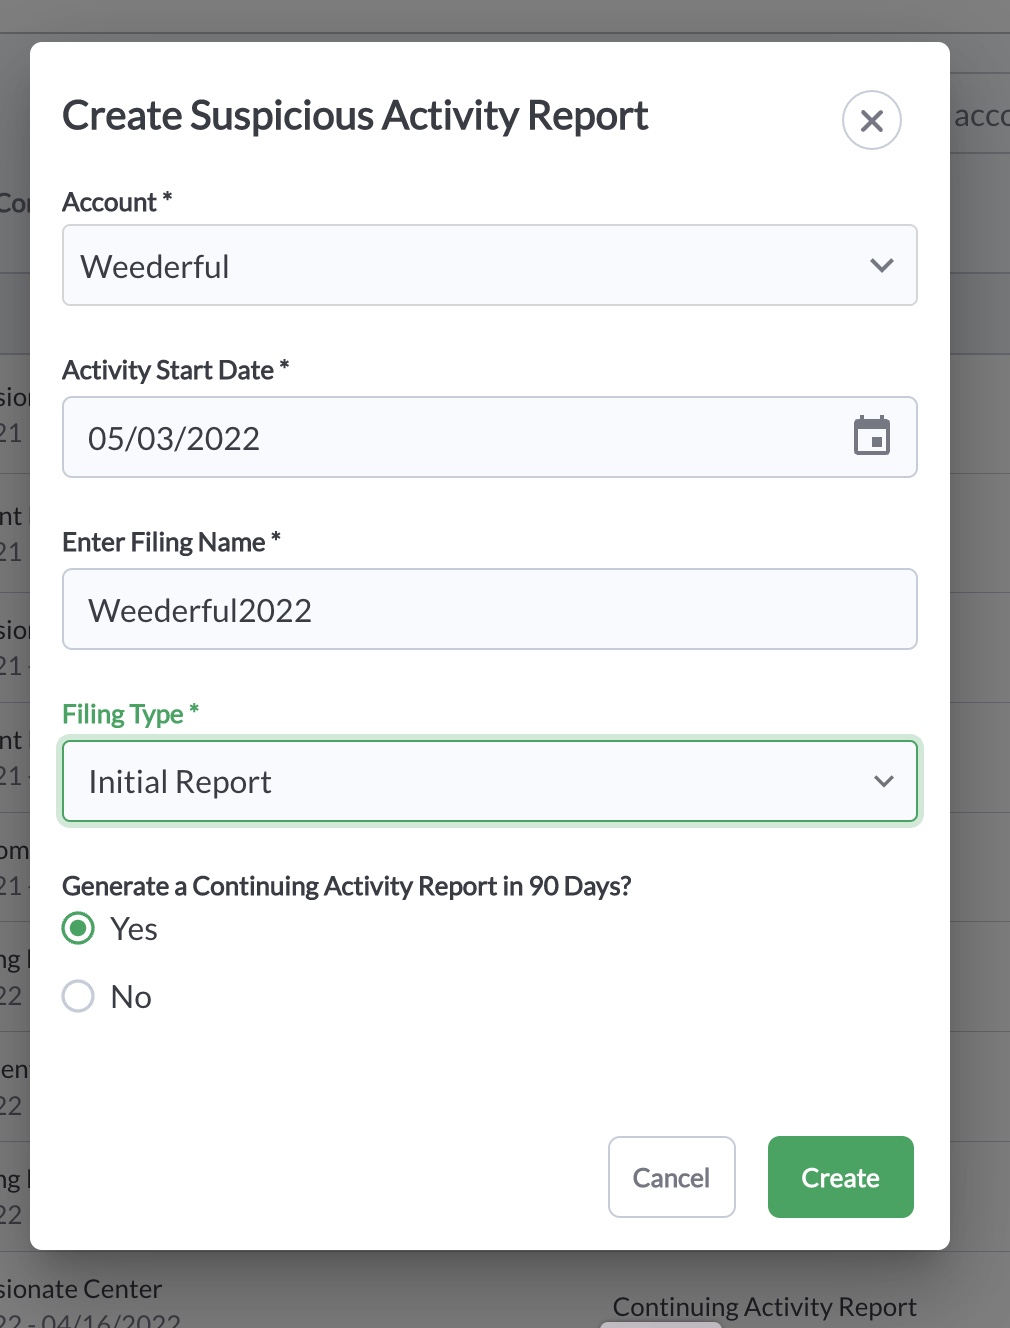
If a customer event has occurred that requires a SAR filing, navigate to the FinCEN module. At the top right of the screen, there is an option to select “Create New Report”. Once clicked, you will then select “Suspicious Activity Report”.
A window will appear that prompts you to input information regarding the report. Complete the request and once finished, click “Create”.
The remaining steps are the same as the steps outlined in the sections above.
Creating a CTR
To create a CTR, navigate to the FinCEN module in the Green Check Platform. Select “Create New Report” at the top left of the screen. Select Currency Transaction Report.

A window will appear that prompts you to input information regarding the report. Complete the request and once finished, click “Create”.

Upon completion of the CTR, you will follow the same process listed above for saving, exporting, and submitting SAR reports.
E-Filing Reports Through Green Check
Green Check supports automated electronic filing of SARs and CTRs directly to FinCEN. E-filing uses FinCEN's Secure Direct Transfer Mode (SDTM) via an SFTP connection to transmit reports and receive acknowledgement files.
Get started with E-Filling by reviewing the setup guide here.
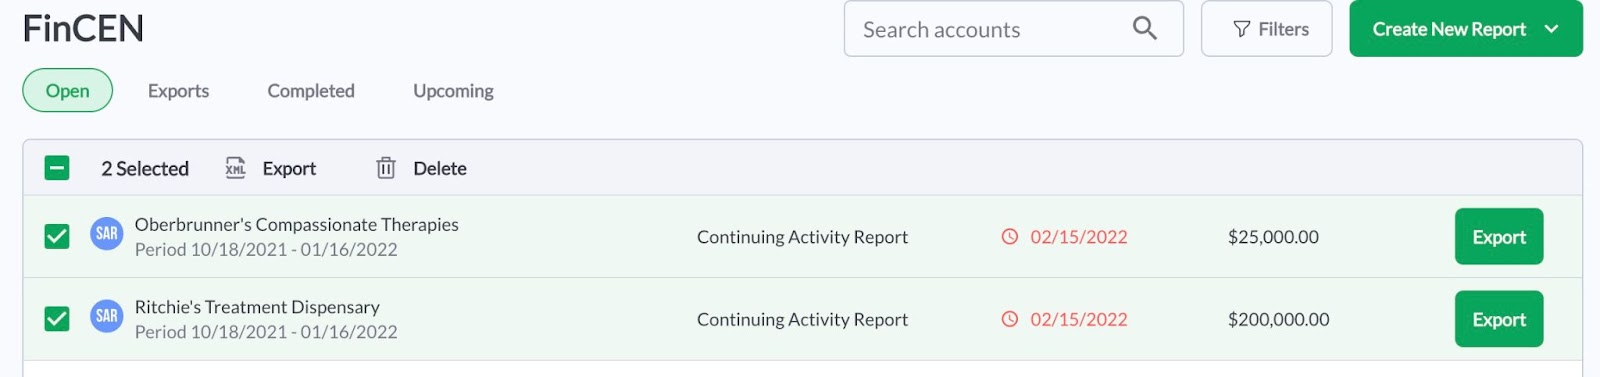
Exporting Multiple FinCEN Reports
As an alternative to E-Filling, Green Check has the ability to export multiple FinCEN reports into one XML file that can be submitted through BSA E-Filing.
Once all individual FinCEN reports have been completed and are ready for export, from the Open tab in the FinCEN module, select the box next to the reports you wish to include in your export.
Once you have selected all reports to include in the export, select the Export XML option directly above the data set:
When selecting the export option, a window will appear to confirm the action:
Next, select the option in the pop-up window to export. This will download the XML file. You will save this file with your internal records and then proceed with the E-Filing process.