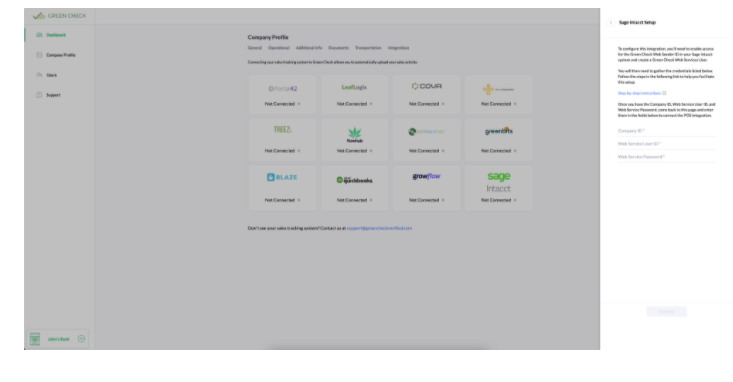
Connect Sage Intacct to Green Check
To upload your Sage Intacct invoice data to Green Check, you’ll need to ensure that both Accounts Receivable and Web Services are both enabled in the Sage Intacct Subscriptions page and then simply connect your account in GCV.
Enable Required Subscriptions
Please ensure that both Accounts Receivable and Web Services are both enabled in the Sage Intacct Subscriptions Page:

Enable Green Check Web Sender ID
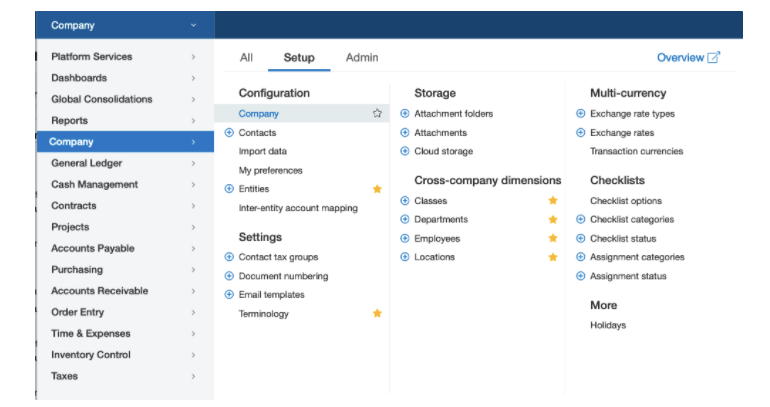
- In the dropdown menu, navigate to the Company > Setup Tab and then select Company under Configuration:
- At the top of the Configuration page, select the Security tab and hit the Edit button in the top right:
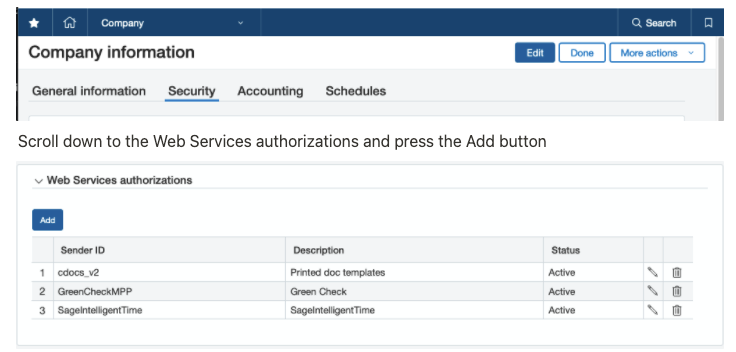
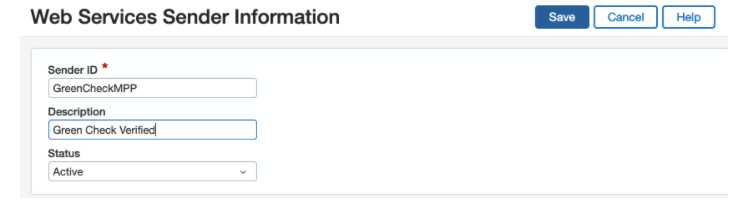
- Enter “GreenCheckMPP” to the Sender ID field, “Green Check Verified” to the Description, and leave the Status as Active. Click the Save button:
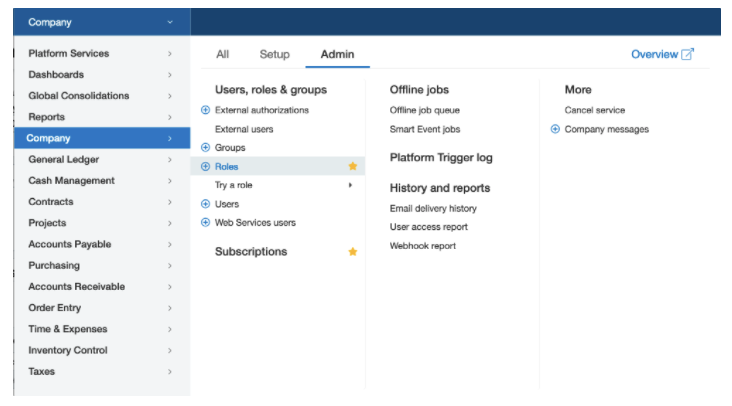
Creating a Role for the Green Check Integration
- Go to Company > Admin tab and select Roles:
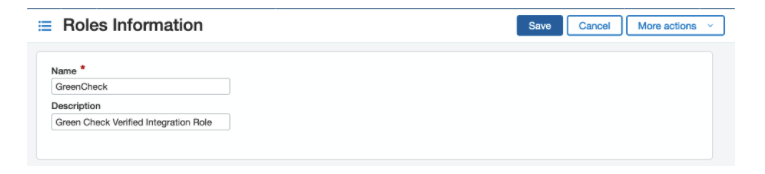
- Add a new role with the name “GreenCheck” and the Description “Green Check Verified Integration Role”. Hit Save:
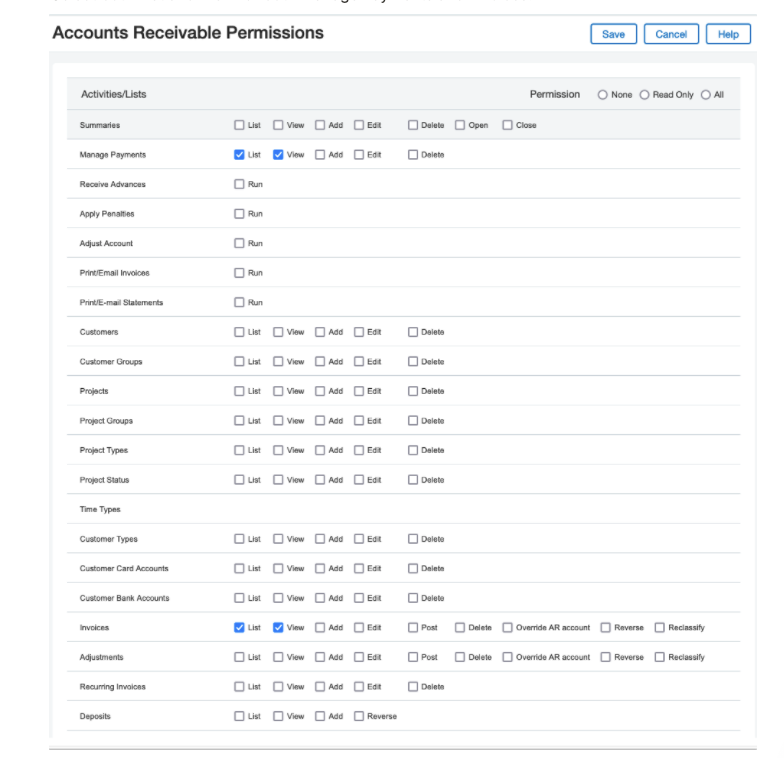
- On the next page, click the checkbox next to Accounts Receivable and click the Permissions button on the right side of the table on the same row as Accounts Receivable:

- Select both List and View for both Manage Payments and Invoices:
- Once it takes you back to the role form, click Save here as well:
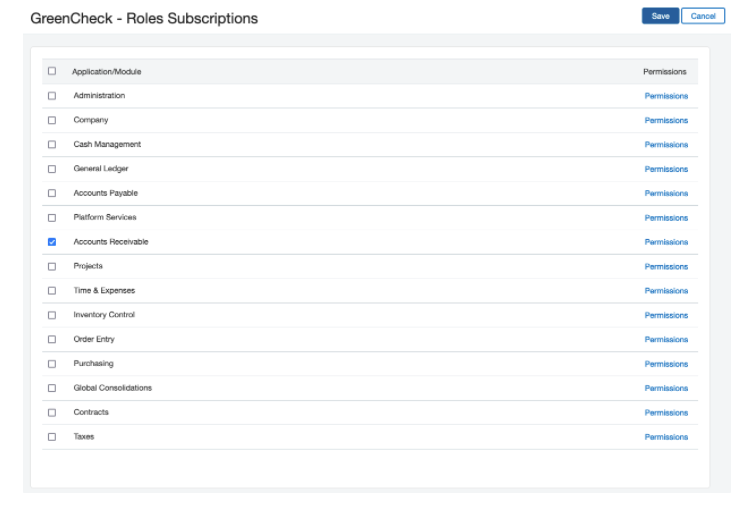
You will also be required to enable permissions for both Locations and Entities.
- You will do this by going back to the Role form and clicking on the Permissions button next to Company.
- From there, you will Select List and View next to both Entities and Locations:
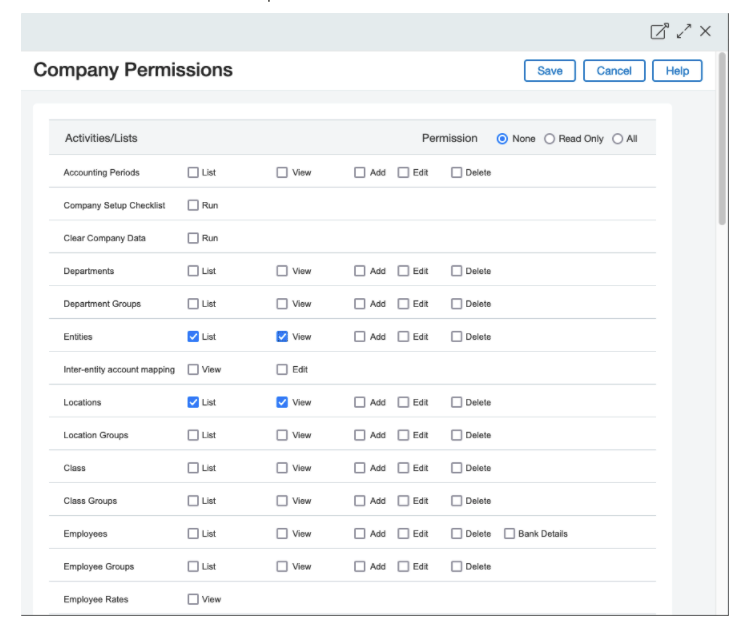
- You will then go back to the Role form and click Save:

Creating a Web Services User
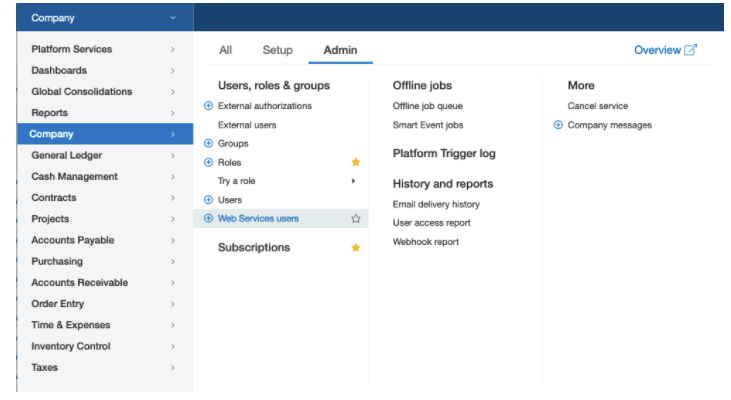
- Navigate to Company > Admin and select Web Services users:
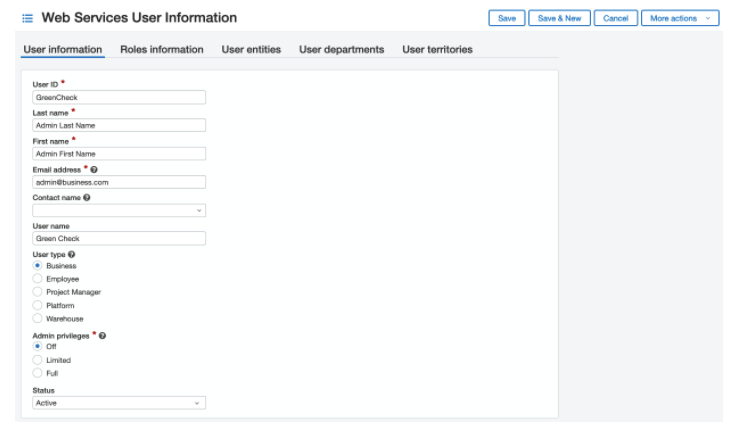
- Create a Web Services user with the User ID of “GreenCheck”. Please fill out the First Name, Last Name, and Email fields using the administrative user who is creating this Web Services User.
You can leave the User Name as “Green Check”, the User type as “Business”, the
Admin privileges as “Off”, and the Status as “Active”. Before clicking Save, see the next
Section:
- Click on the Roles information tab and add the GreenCheck role to the Web Services User:

- Now click Save. The email address that was entered for the GreenCheck Web Services User should receive an email that contains a password, company id, and user id. These are the values you will need to enter on the Green Check Integration page on app.greencheckverified.com. Once you are logged in to your account go to Company Profile > Integrations > Sage Intacct: