Questionnaires allow you to automate your ongoing due diligence process. Read on to learn how to create and distribute questionnaires for your financial institution!
Questionnaires are ongoing due diligence that you can create in Green Check and schedule on recurring frequencies or as needed. After CRBs go through initial due diligence, there are documents, questions, and other information you need to collect from them on a periodic basis.
Examples include:
- Hemp results collected monthly
- Reminders to upload manual sales weekly
- Attestations that the business is depositing funds only from the sale of state legal sales on a yearly basis
- Etc.
Build questionnaires
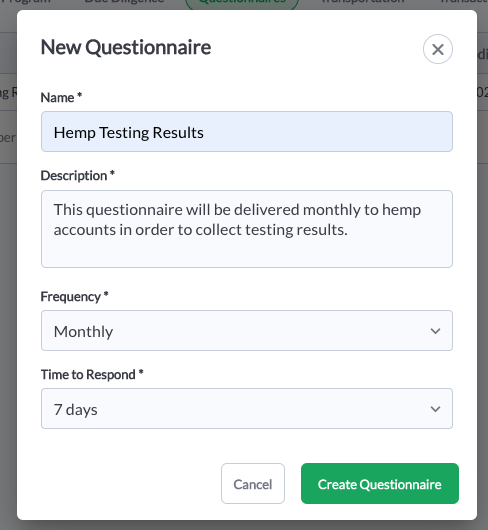
Building questionnaires is simple, especially with Green Check’s intuitive form builder. To create a questionnaire, go to Settings and navigate to the Questionnaires tab. Click the New Questionnaire button to get started.
- Enter a name for your questionnaire. Use something descriptive enough so you can identify it within a list easily.
- Enter a description.
- Choose its frequency. Frequencies are set at the templated questionnaire level (so here in Settings). You cannot modify it after it has been set, so be sure to choose the frequency that makes the most sense for the questionnaire you are building.
- Set the time to respond, which is the number of days the CRB account will get to respond to the questionnaire once it gets distributed to them before it becomes late.
- Click Create Questionnaire to save these changes and start building your questionnaire!
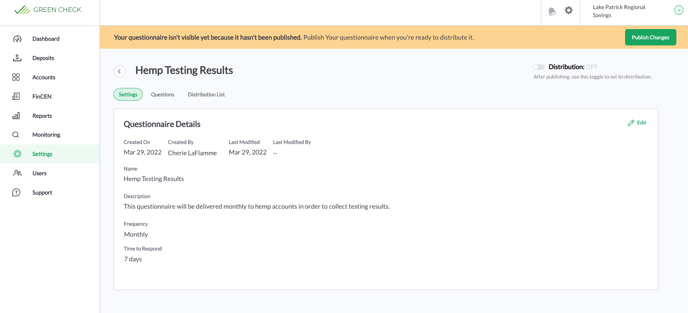
After you create a questionnaire, you’ll be directed to the template area where you’ll see its settings, create the questions, and set its distribution.
Add fields to your questionnaire
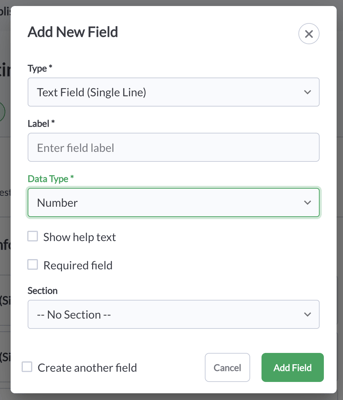
This is the fun part! Go to the Questions tab to begin using the form builder. Click on the New Field button or New Section link to get started. Sections help you organize your fields and can be used to instruct users. Rapidly add fields by using the "Create another field" checkbox in the bottom right-hand corner of the New Field modal. This will keep the modal open and allow you to add new fields quickly.
For fields, there are several to choose from, which include:
- Text (Single Line): Capture brief information, such as a number, text response, or other structured information. This field type has validation built-in, meaning that you can select the type of response you expect from the person completing the field, which simplifies reporting.
- Validation Types: Text, Number, Email, URL, Phone, Currency
- Text (Multi Line): Capture longer strings of text for explanation purposes.
- Dropdown: A dropdown select field (the user will only be able to select one option). Enter semicolons between responses.
- File Upload: Collect files from CRBs as needed within questionnaires.
- Date Picker: Have CRB users choose calendar dates using a standardized date picker.
- Radio Button: Present radio button options to CRBs within questionnaires (the user will only be able to select one option). Enter semicolons between responses.
- Checkboxes: Allow CRB users to select one or multiple responses using the checkbox fields.
Publish a questionnaire
After you’ve built your questionnaire, it’s time to publish it! In order to distribute a questionnaire, it must first be in a published state (not a draft). Use the top banner to publish your questionnaire and make it available for distribution.
Click the Publish Changes button to publish it. Publishing it will make it available for distribution, both on a recurring basis and as needed (ad-hoc) in the Active Accounts area.
Note: If you make changes in the future, you will have to re-publish your changes before the next version of the questionnaire will become available for distribution.